


The new calculation method for Sheet metal repair
What are the differences between the “old” and the “new” calculation methods for Sheet metal repair?
The user was previously limited when it came to describing the damage to the system – only the degree of access (to the rear of the damage) and the damage surface could be specified.
Our time studies have shown that damage is usually repaired from outside, which meant that the old way of describing the damage was outdated. There are now several parameters to describe the damage.
The system now calculates Sheet metal repair times for aluminium as well.
Previously, it was only possible to calculate Sheet metal repair by position, without the system knowing which part it related to. Sheet metal repair is now calculated by spare part. You will recognise this principle from Plastic repairs.
What about existing calculations?
- Existing calculations (created before release 21.11, before 27/11/2021) containing Sheet metal repair are locked to the “old” Sheet metal repair calculation method – even if all previously selected Sheet metal repair measures were to be removed.
- Existing calculations that DO NOT contain Sheet metal repair use the “new” Sheet metal repair calculation method if Sheet metal repair is selected.
- New calculations (created after release 21.11, 27/11/2021 or later) use the “new” Sheet metal repair calculation method if Sheet metal repair is selected.
How do I get to the new Sheet metal repair dialogue?
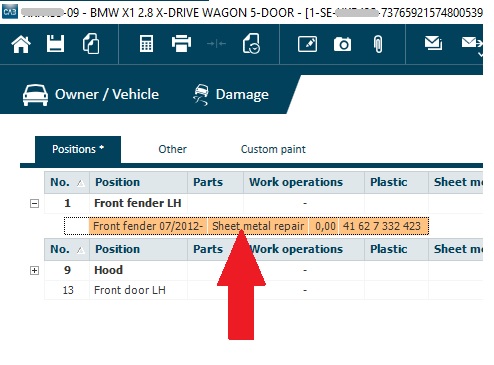
Open a position to add a Sheet metal repair measure by double-clicking in the “Sheet metal repair” column for the desired position or by double-clicking the position name.
The Sheet metal repair tab has been removed with this release, and only remains for the “old” calculation method.
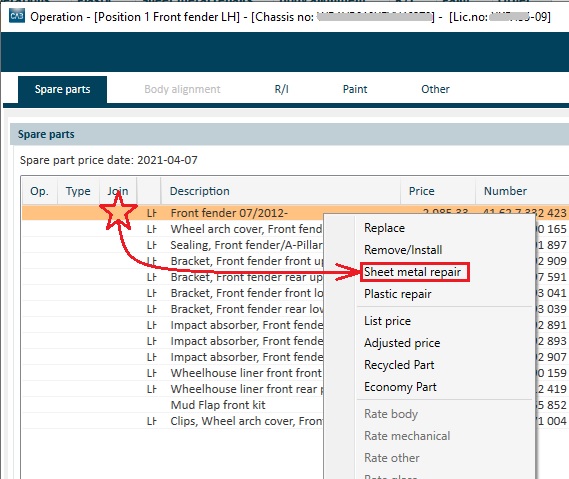
In the opened position, you now select the spare part you want to repair by right-clicking on the spare part text…
...or by right-clicking on the spare part’s 3D image…
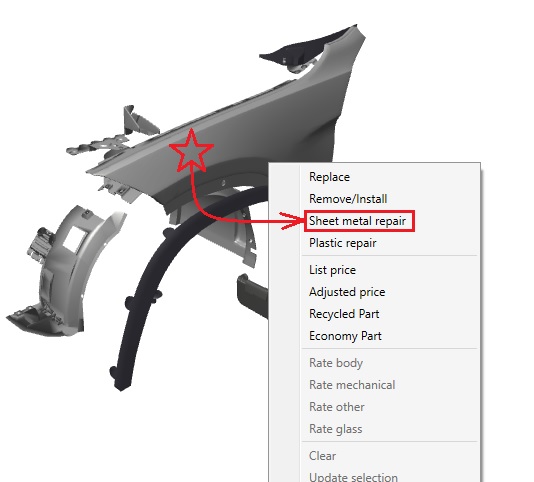
...and selecting “Sheet metal repair”.
How does the new Sheet metal repair dialogue work and what can I do there?
You start by specifying what material the spare part is made of.
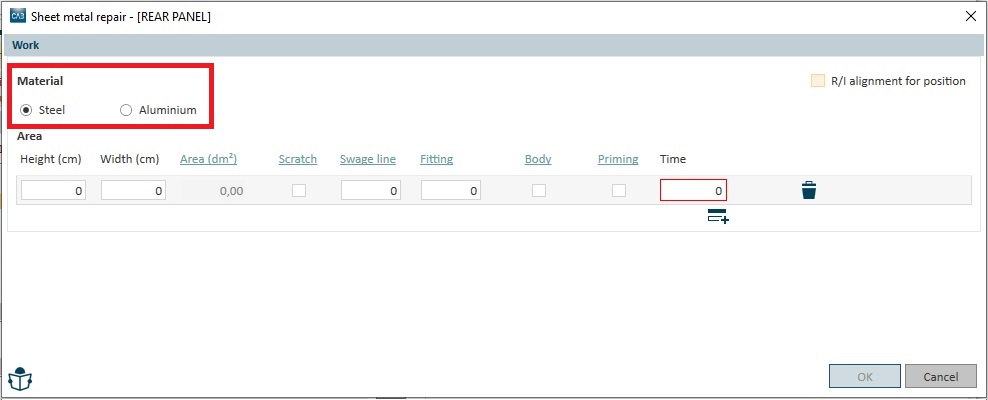
Depending on what you enter, the system will calculate different repair times for different materials.
For the next step, the actual damaged surface must be specified (NOT the area you believe will be covered by filler during the repair).
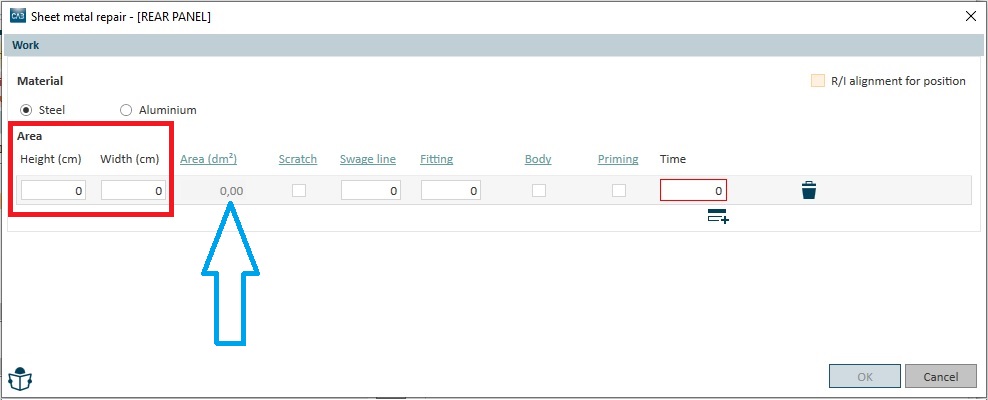
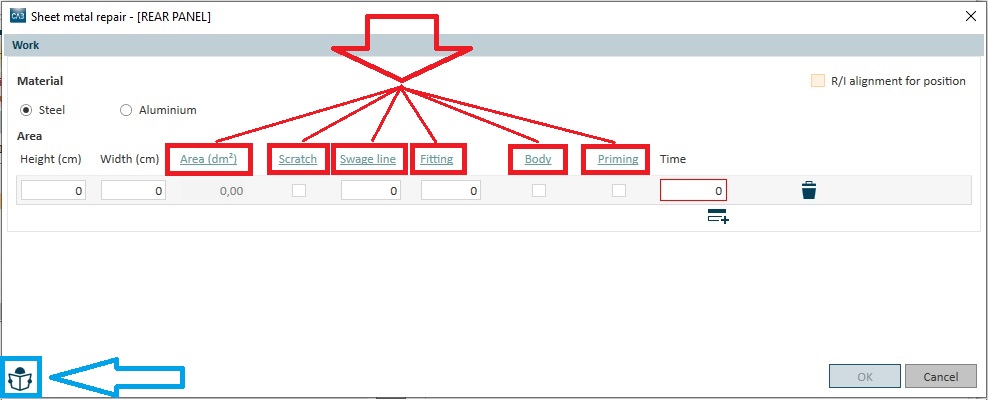
The Height and Width of the damage surface must be indicated in centimetres. The system will immediately calculate and display the size of the surface (under column “Area (dm2)”) (green arrow above). It is no longer possible to specify a damage surface manually.
You can now specify additional parameters that can affect the repair time. These parameters are:
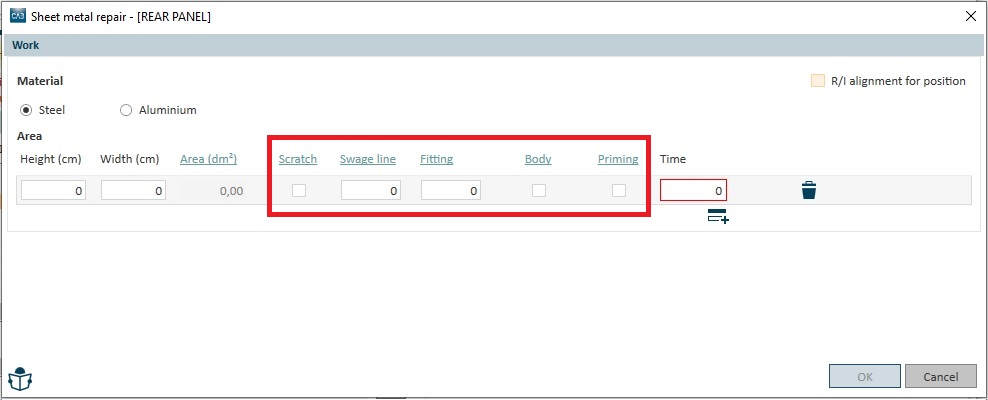
- Scratches – select if the damage did not change the structure of the panel (paint damage only)
- Folds – select if the damage has ended up in/by “normal” folds or complicated design folds (maximum number = 5)
- Fitting – indicated if between one and a maximum of three adjoining parts have to be fitted to the damage surface during the repair process
- Body – select if the damage surface is covered by underbody sealer
- Priming – select if the car manufacturer requires the panel to be primed before filler is applied
Finally, select if the component has to be removed from the vehicle in order to be repaired.
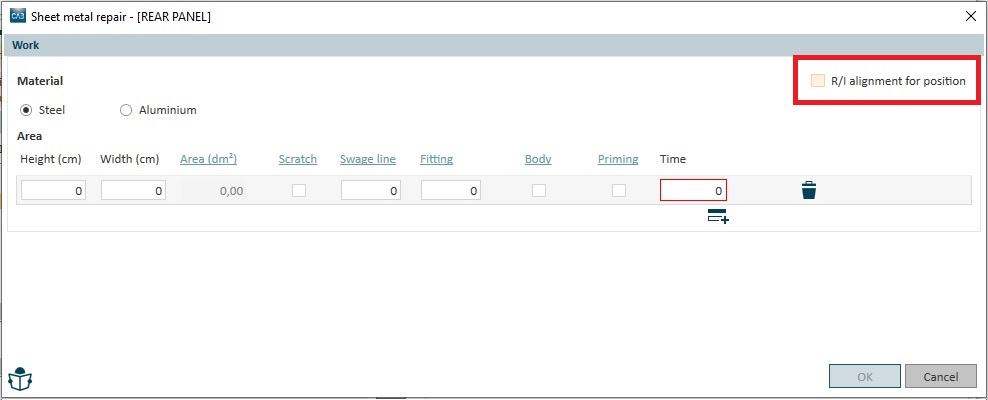
NB: This operation gives the dismantle/install chain for the position’s main component only!
If you have finished working on the damage surface, you can add several new rows, if necessary. The principle for adding new rows is exactly the same as before: click the row icon with the plus sign.
Can I get help if I have questions about anything in the Sheet metal repair dialogue?
With the new Sheet metal repair in CABAS, we have created new, dynamic user instructions. This means that you can click on a term in the interface (example: red arrows below) and go directly to the correct section in the user instructions.
If you want to read the user instructions in full, you can click on the icon for this as usual (blue arrow below).
How do I get back to the Sheet metal repair dialogue?
If you need to supplement previous selections (changes or additions), go back to the Sheet metal repair dialogue by double-clicking the on “X” in the “Sheet metal repair” column in the Action window and then…
...double-click on the spare part in the Spare Parts window…
…or double-click in the Action window (expanded mode) on the Sheet metal repair row you need to supplement.
How are the calculation results presented after the introduction of the new calculation method for Sheet metal repair?
Existing specifications that are affected by the new Sheet metal repair are the Compilation and the Work specification.
The Compilation shows Sheet metal repair operations as before, with time, hourly charge and cost:
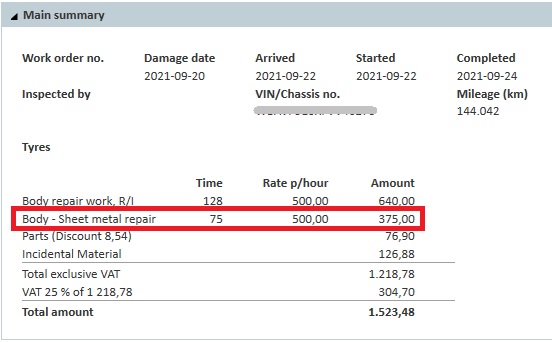
The appearance of the work specification has been changed. Each damage surface is now presented with its size and time (the degree of access is no longer included). Any time that has been entered manually is marked with footnote 2 (manually timed):
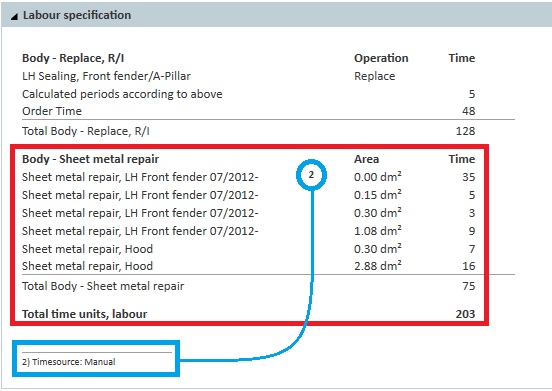
The system now provides a separate specification for Sheet metal repair (Sheet metal repair). This sets out all the selections and inputs that have been made per damage surface. The times are presented per damage area and summarised per spare part. Any time that has been entered manually is marked with footnote 2 (manually timed):
Important! The only way to print the new specification for Sheet metal repair is by clicking on the print icon on the Sheet metal specification (red arrow below).
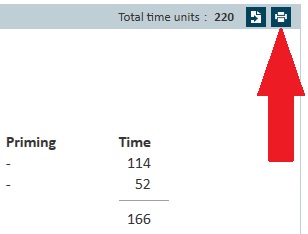
We will add that specification to the others you will get when printing the complete estimate with all its specifications with the next coming release.